
A crawl space can stay wet even when the gutters work and the yard looks dry. If groundwater rises close to the underside of your home, moisture may enter through the soil, collect along foundation walls, or push through low spots. In that situation, repairing a downspout alone will not solve the problem.
For North Carolina homeowners researching crawl space drainage high water table problems, the important question is not simply how to remove water. It is how to identify the source, collect groundwater reliably, discharge it safely, and control the moisture that remains.
Carolina Encapsulation Company helps homeowners think through those connected issues. Understanding what happens beneath your home makes it easier to compare recommendations and avoid paying for a system that addresses only part of the problem.
What a High Water Table Means Beneath Your Home
The water table is the upper surface of groundwater in saturated soil. Its depth changes with rainfall, seasonal conditions, nearby waterways, soil characteristics, and development around a property. A water table that stays comfortably below a crawl space during dry weather may rise during prolonged rain.
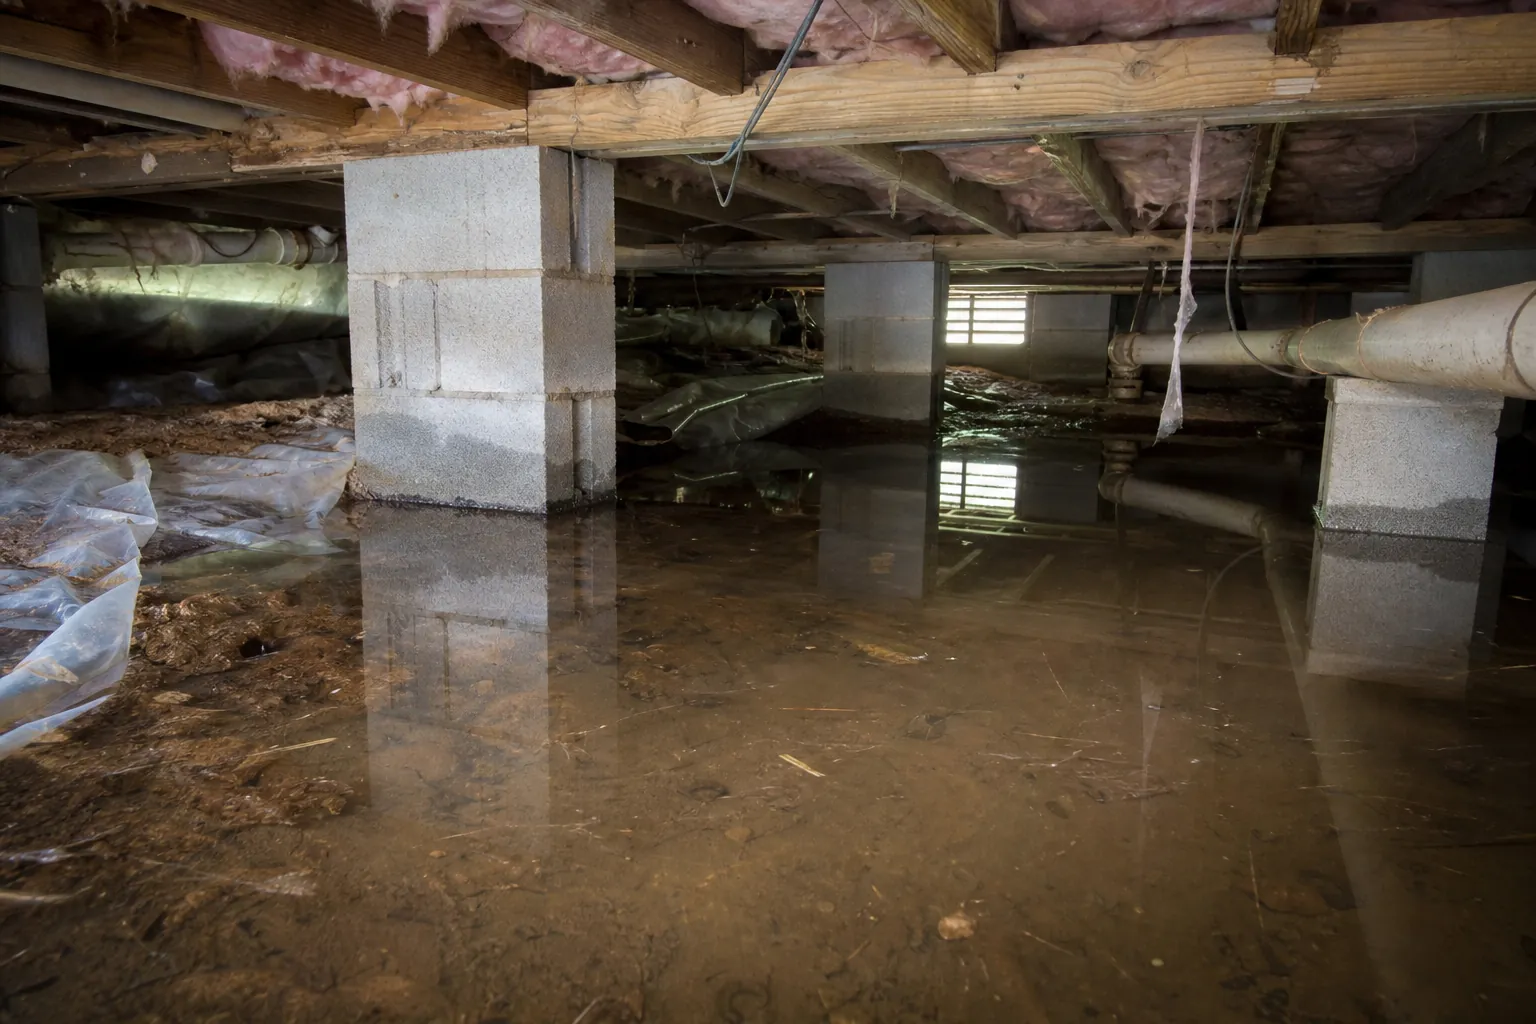
When groundwater reaches the crawl space elevation, water can seep into the enclosed area. It does not always arrive as a dramatic stream. Sometimes the first clues are damp soil, recurring puddles, or wet foundation surfaces that never fully dry.
North Carolina properties do not all behave alike. Coastal and low-lying sites may have shallow groundwater, while Piedmont properties can experience water perched above less permeable soil layers. Mountain properties may receive subsurface flow moving downhill. A diagnosis should account for the actual site rather than assume one statewide cause.
A perched water condition can resemble a regional high water table. Water accumulates above a restrictive soil layer instead of joining deeper groundwater immediately. That distinction matters because the best collection method depends on where water moves and how it reaches the foundation.
Drainage can manage water around or inside a crawl space, but it should not be presented as a guarantee that groundwater across an entire property will be permanently lowered.
Separate Groundwater From Other Crawl Space Water Sources
Before choosing equipment, determine whether the crawl space is receiving groundwater, surface runoff, plumbing leakage, condensation, or a combination. Several problems can exist at once, and each needs a different response.
Observe conditions after rain if access is safe. Note where water first appears, whether it enters from one wall, and how long it remains. Photos taken on different dates can help a contractor understand patterns that are not visible during a dry-weather inspection.
- Water concentrated below a bathroom or kitchen may indicate a plumbing leak that needs repair before drainage work begins.
- Water entering near a downspout or low exterior grade may be related to roof runoff or surface drainage.
- Water appearing across the soil after extended rainfall may suggest rising groundwater or subsurface flow.
- Droplets on cool pipes or ductwork may indicate condensation rather than water entering through the foundation.
- A musty odor without visible puddles can still indicate excessive humidity or damp materials.
These observations are clues, not a definitive test. A useful inspection includes exterior drainage conditions, crawl space elevations, visible entry points, foundation condition, and existing equipment. Depending on the property, additional evaluation by a drainage specialist, plumber, or qualified design professional may be appropriate.
Do not enter standing water near electrical equipment. Sagging floors, damaged supports, strong sewage odors, or suspected contaminated water also warrant professional evaluation before routine moisture work proceeds.
Start With Surface Water Improvements
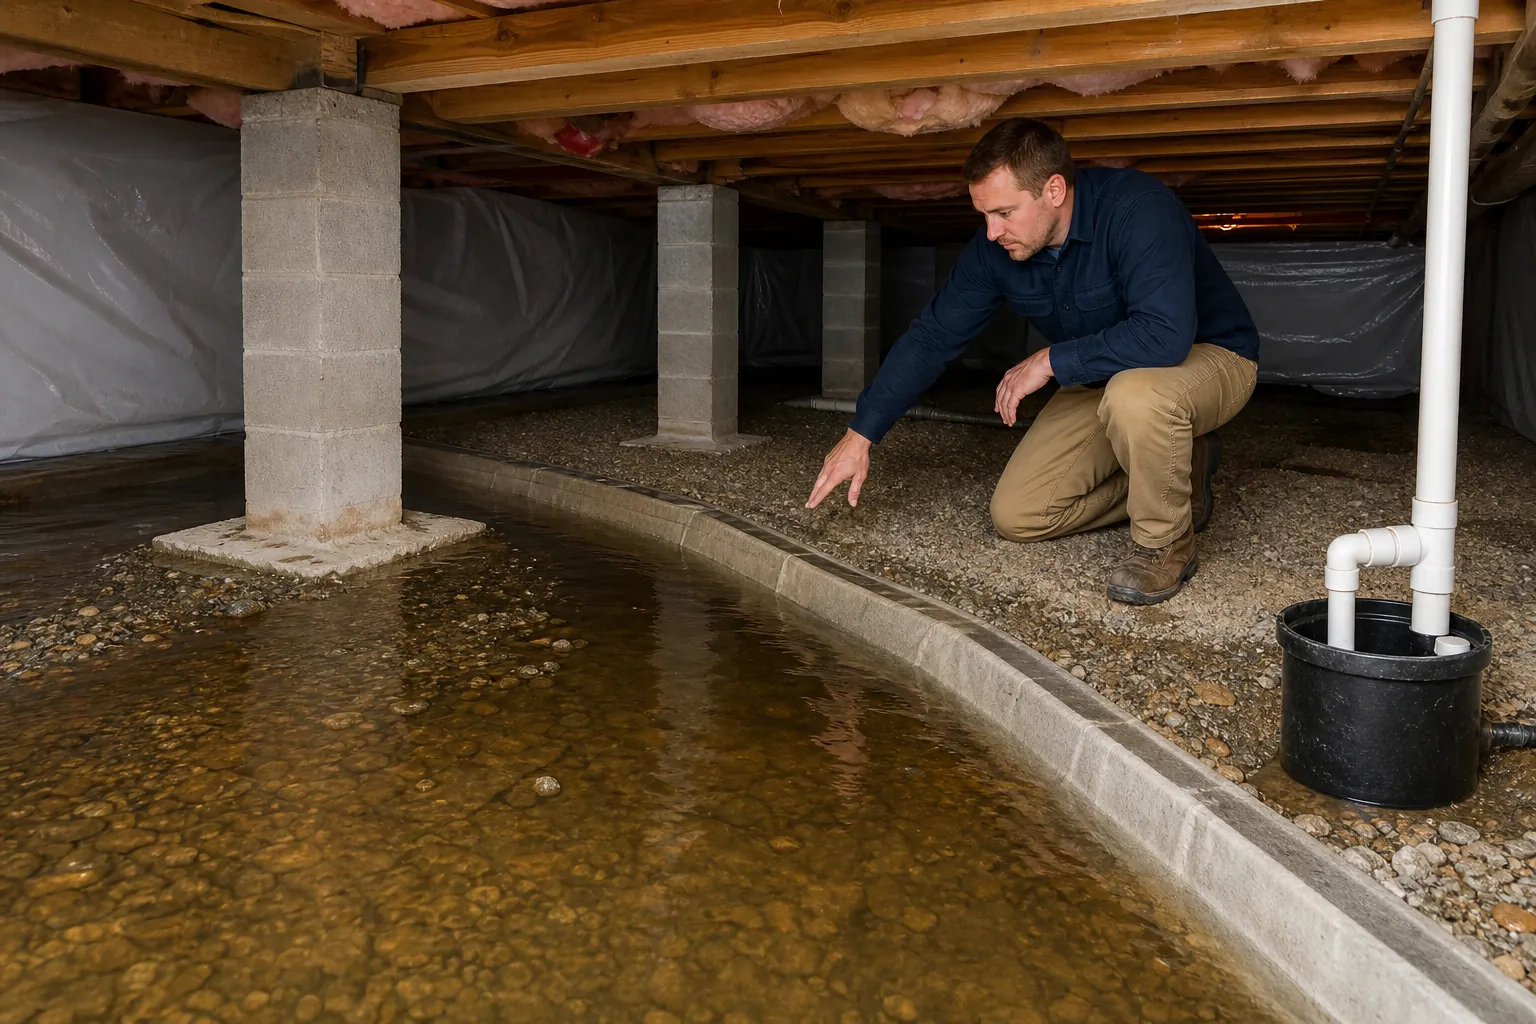
Even when groundwater is the main issue, roof and yard water should not be allowed to collect beside the foundation. Reducing those avoidable inputs can lessen the load on an interior drainage system and help distinguish the remaining groundwater problem.
Inspect gutters for overflow, loose connections, and outlets that release water next to the house. Downspout extensions should direct water to an appropriate location without sending it toward a neighbor, septic components, or another part of your own foundation.
Check whether soil slopes toward the home. Settled backfill, raised planting beds, patios, and walkways can create pockets that hold runoff. Correcting grading may help, but changes must preserve appropriate clearance around siding, vents, and other building components.
A yard drain or swale can intercept surface runoff where the site permits. However, a shallow landscape drain does not automatically solve groundwater rising beneath a crawl space. Its elevation, outlet, and relationship to the water source determine whether it helps.
Ask where every proposed drain will discharge before approving the work. A pipe that ends in a saturated low spot may move water briefly and then allow it to return. On difficult sites, exterior drainage planning may require more than adding a few feet of pipe.
How Interior Crawl Space Drainage Collects Groundwater
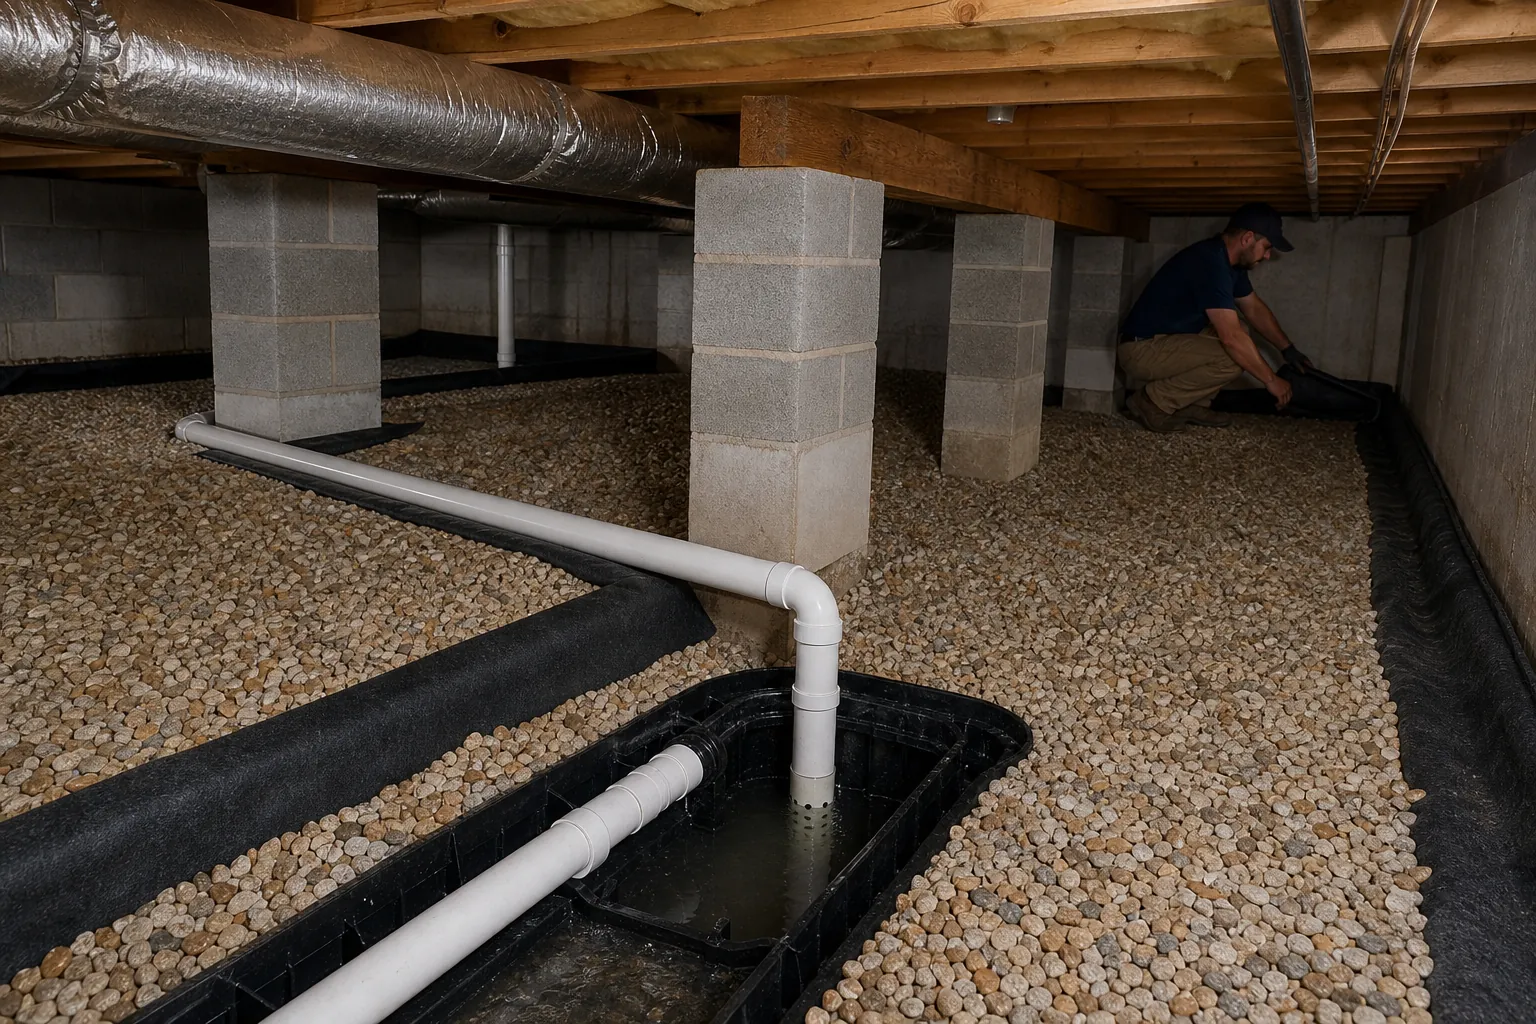
An interior drainage system provides a controlled path for water that reaches the crawl space. Rather than allowing water to spread across the soil, the system collects it and directs it toward an outlet or sump basin.
A common approach uses a drainage trench with collection piping and compatible drainage material. The layout depends on crawl space geometry, entry points, soil conditions, and the elevation of the sump. Some homes need perimeter collection, while others need additional drainage through interior low areas.
Pipe placement matters. A drain installed too high may leave water beneath it, while inappropriate excavation near footings can create structural concerns. Installation should account for foundation depth and support locations rather than follow a one-size-fits-all trench detail.
Soil management also matters. Fine particles can migrate into drainage materials and reduce performance. The appropriate aggregate, pipe configuration, and filtration approach should be selected for the soil and system design. Wrapping everything indiscriminately is not a substitute for that evaluation.
- The collection layout should address the locations where water actually enters or accumulates.
- The drainage path should lead consistently toward the planned discharge point or sump basin.
- The installation should protect footings, support piers, plumbing, and other crawl space components.
- The completed system should allow practical access for inspection and maintenance.
- The proposal should explain how collected water will leave the property safely.
An interior system manages incoming water; it does not waterproof every foundation surface or repair structural damage. If an inspection finds deteriorated masonry, displaced components, or unusual cracking, those conditions may need separate evaluation.
Choose a Sump System for Real Site Conditions
When collected water cannot drain by gravity to a suitable outlet, a sump pump is often necessary. The pump moves water from a basin through a discharge line to an approved location outside the crawl space.
Pump selection should consider expected inflow and the resistance created by the discharge route. Vertical lift, pipe size, pipe length, and fittings all affect performance. A pump's advertised maximum flow does not necessarily reflect what it can move after installation.
Basin size and placement influence how the system cycles. A poorly arranged basin may encourage frequent starts or fail to collect water from all intended areas. A secure cover can also help limit moisture release and protect the opening while allowing service access.
Reliable electrical service is essential. Pump wiring and receptacle requirements should follow applicable codes and the equipment manufacturer's instructions. An extension cord should not be treated as a permanent electrical solution.
Consider what happens during a power outage or primary pump failure. A backup pump, battery-supported system, or other appropriate arrangement may reduce risk, but backup capacity and runtime have limits. The plan should match the home's inflow conditions rather than rely on a vague promise of protection.
A high-water alarm adds another layer of awareness. Ask how the alarm works, where it can be heard, and whether remote notifications are available. An alarm helps only if someone receives the warning and knows what action to take.
Discharge Planning Is Part of the Drainage System
A sump pump cannot solve a water problem if its discharge sends water back toward the crawl space. The outlet needs enough separation and a suitable route to prevent recirculation, erosion, and nuisance flooding.
The best discharge location depends on property elevations, available drainage features, soil absorption, and local requirements. Some sites permit an effective gravity route after pumping. Others have limited options because surrounding ground is flat or stays saturated.
Do not assume a dry well will work in a high-water-table setting. If the receiving soil is saturated, there may be little capacity to accept additional water. A discharge design should evaluate that limitation before excavation begins.
Connections to public drainage infrastructure, roadside ditches, or other receiving systems may require permission or permits. Pumped groundwater should not be routed into a sanitary sewer without explicit authorization. Local rules and site conditions govern what is acceptable.
The discharge line also needs protection against blockage and seasonal weather. North Carolina can experience freezing conditions, so routing and outlet details should account for exposure. Ask how the system will be inspected and what happens if the primary outlet becomes obstructed.
Why Encapsulation Comes After Bulk Water Control
Encapsulation and drainage solve related but different problems. Drainage manages liquid water. Encapsulation limits moisture movement from the soil and helps create a more controlled crawl space environment.
Installing a vapor barrier over an unresolved water problem can leave water beneath the liner or allow it to collect on top. Neither outcome should be ignored. The drainage layout and encapsulation details need to work together from the beginning.
A complete moisture plan may include a durable ground liner, sealed seams, appropriate wall and penetration details, and treatment of exterior openings consistent with the chosen crawl space design. Installation should preserve required inspection access and avoid concealing conditions that need attention.
Termite inspection considerations are especially important when covering foundation surfaces. Applicable requirements and the pest-control provider's inspection needs should be discussed before materials are installed. Foam or liner details should not inadvertently prevent necessary inspections.
Previously wet insulation, damaged wood, or microbial growth may need separate treatment or replacement. Encapsulation does not restore deteriorated structural members. If damage is suspected, get the appropriate assessment rather than simply covering it.
The sequence is straightforward: address water sources, install needed drainage and pumping, resolve damaged materials, and complete the moisture-control enclosure. Site conditions may change the details, but bulk water should not be an afterthought.
Control Humidity After the Water Is Managed
A crawl space can remain humid even after standing water is removed. Damp soil, foundation materials, and previously wet wood can continue releasing moisture. Outdoor air can also introduce moisture when it reaches cooler crawl space surfaces.
A properly designed closed crawl space needs an appropriate drying strategy. Depending on the design and applicable requirements, that may involve a dedicated dehumidifier or another approved approach. Simply closing vents without considering drying is incomplete.
A relative humidity range around 45 to 55 percent is often a practical operating target, but actual settings should reflect equipment guidance and conditions. Persistent readings near or above 60 percent deserve attention, especially if odors or condensation return.
Measure humidity in a representative location, away from direct equipment discharge. Consider checking more than one area in a large or divided crawl space. A single dry reading beside a dehumidifier may not describe conditions near the far end of the home.
Dehumidifier condensate needs a reliable drain route. Filters, coils, and drain connections require maintenance according to the manufacturer. A dehumidifier helps control water vapor; it is not a substitute for drainage when groundwater is actively entering.
Questions to Ask Before Approving a Proposal
A useful proposal explains why each component is needed and how the components work together. Comparing only a total price or liner thickness can miss the drainage decisions that matter most during sustained rain.
- Ask what evidence supports the diagnosis of groundwater rather than a leak or surface runoff problem.
- Ask where drainage trenches will be installed and how excavation will avoid undermining foundations or supports.
- Ask how the pump was selected for the proposed discharge distance and vertical lift.
- Ask where pumped water will go and whether the outlet requires approval.
- Ask what backup protection, alarms, and maintenance access are included.
- Ask which repairs, electrical work, permits, and damaged-material removal are included or excluded.
- Ask what the warranty covers and what maintenance responsibilities remain with the homeowner.
Costs vary with access, crawl space size, water volume, excavation difficulty, discharge routing, and existing damage. A smaller home with a difficult outlet can require more planning than a larger home with straightforward drainage. An inspection-based scope is more useful than an unsupported price range.
Maintain the System Through North Carolina's Wet Seasons
After installation, check the crawl space following significant rain and periodically during ordinary weather. Look for new puddles, loose liner seams, unusual pump cycling, and changes in humidity. Keep a simple record so developing problems are easier to recognize.
Follow the manufacturer's testing instructions for pumps, alarms, and backup equipment. Keep the discharge outlet clear and verify that landscaping changes have not redirected water toward the house. Arrange service if the pump runs continuously, sounds different, or fails to lower the basin water level.
If your North Carolina crawl space repeatedly gets wet, Carolina Encapsulation Company can help you discuss the next steps. Call 704-207-9348 to talk about an evaluation and a coordinated drainage and moisture-control plan suited to your home.
Call 704-207-9348 to talk through next steps.