
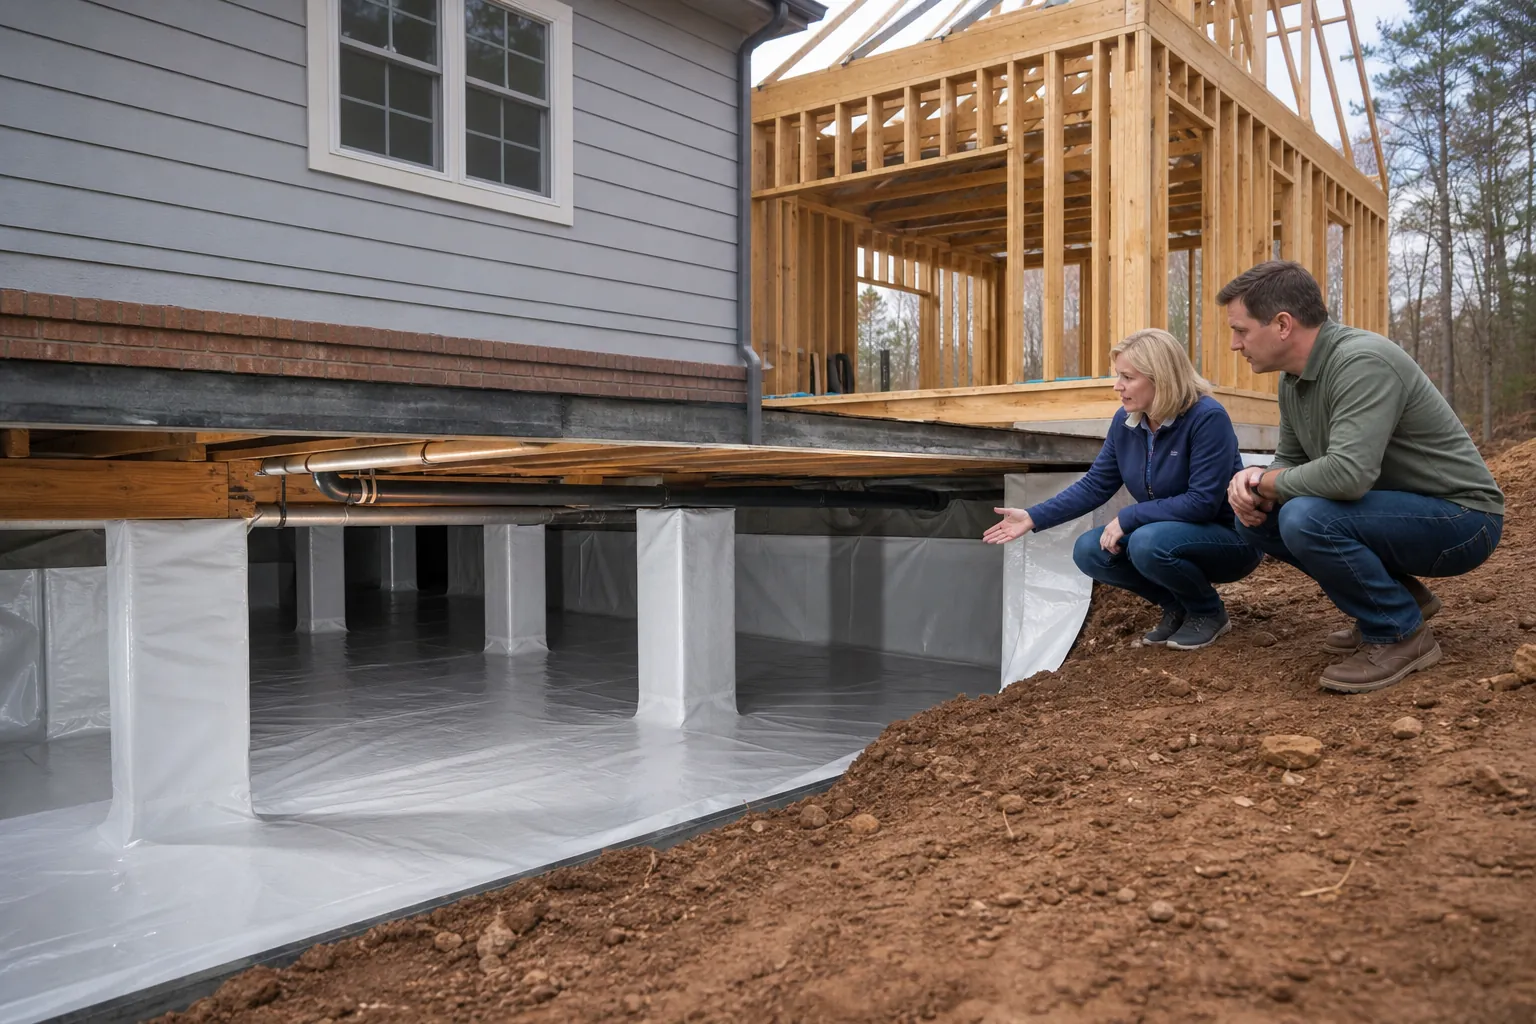
A home addition should give you usable space without introducing moisture problems underneath it. When an addition sits over a crawl space, decisions about grading, foundation drainage, access, insulation, and air sealing affect how that new space performs. They can also change conditions beneath the original house.
Planning crawl space encapsulation for a home addition is easiest before foundation work begins. That timing allows your builder and encapsulation contractor to coordinate details that become harder to correct once framing, utilities, and finishes are installed.
For North Carolina homeowners, the goal is not simply to cover the dirt. It is to create a moisture-control plan that accounts for humid weather, rainfall, the existing foundation, and the connection between old and new construction. Carolina Encapsulation Company helps homeowners evaluate those details and identify a practical path forward.
Why An Addition Changes Your Crawl Space
An addition changes more than the footprint of your home. A new roof section redirects runoff. New footings can interrupt drainage paths. A foundation wall may separate the original crawl space from the new one, while plumbing and ductwork create additional penetrations that need careful sealing.
The existing crawl space may also have problems that were manageable before construction but become more noticeable afterward. Damp soil, damaged insulation, or recurring standing water should be investigated rather than hidden behind a new liner.
Consider the new and existing areas together. Encapsulating only the addition may leave an uncontrolled moisture source directly beside it. On the other hand, extending an existing system without checking its condition can preserve weak seams, damaged materials, or inadequate humidity control.
- Your addition may create a separate crawl space compartment that needs its own access and moisture-control strategy.
- Changes to gutters and downspouts may concentrate water near the new foundation.
- New mechanical equipment may require clear service routes and accessible shutoff valves.
- Foundation openings between old and new areas may affect air movement and humidity control.
A useful first step is a joint review of the addition drawings and the existing crawl space. That review should identify where water can enter, how workers will access each section, and which details require approval from the local building department.
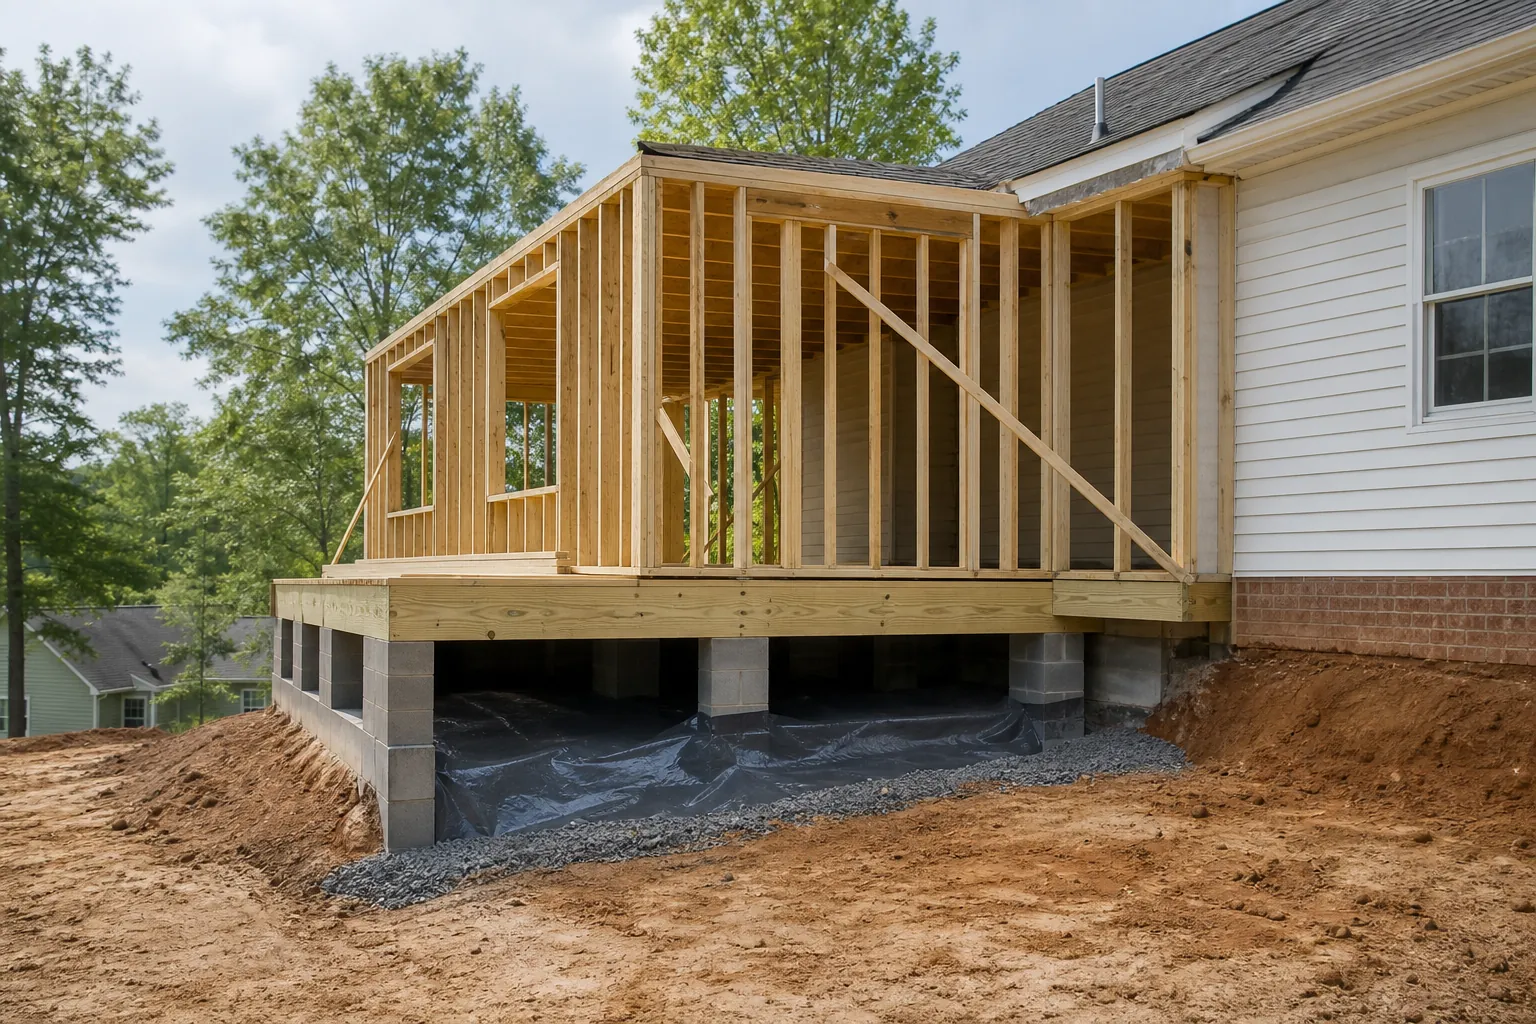
Start With Water Management Before Encapsulation
Encapsulation materials help limit moisture movement from the ground and outside air, but they do not replace drainage. If water collects beneath the house, covering the soil without addressing the source can leave the underlying problem unresolved.
Before installation, evaluate the lot during or soon after rainfall when practical. Look for runoff moving toward the foundation, low areas beside the proposed addition, and downspouts that discharge too close to the house. Review any history of crawl space flooding with your contractor.
Construction can temporarily disturb otherwise effective drainage. Excavation piles, equipment tracks, and unfinished grading can direct water into the new crawl space. A temporary water-management plan matters while the permanent system is being built.
Coordinate Exterior And Interior Drainage
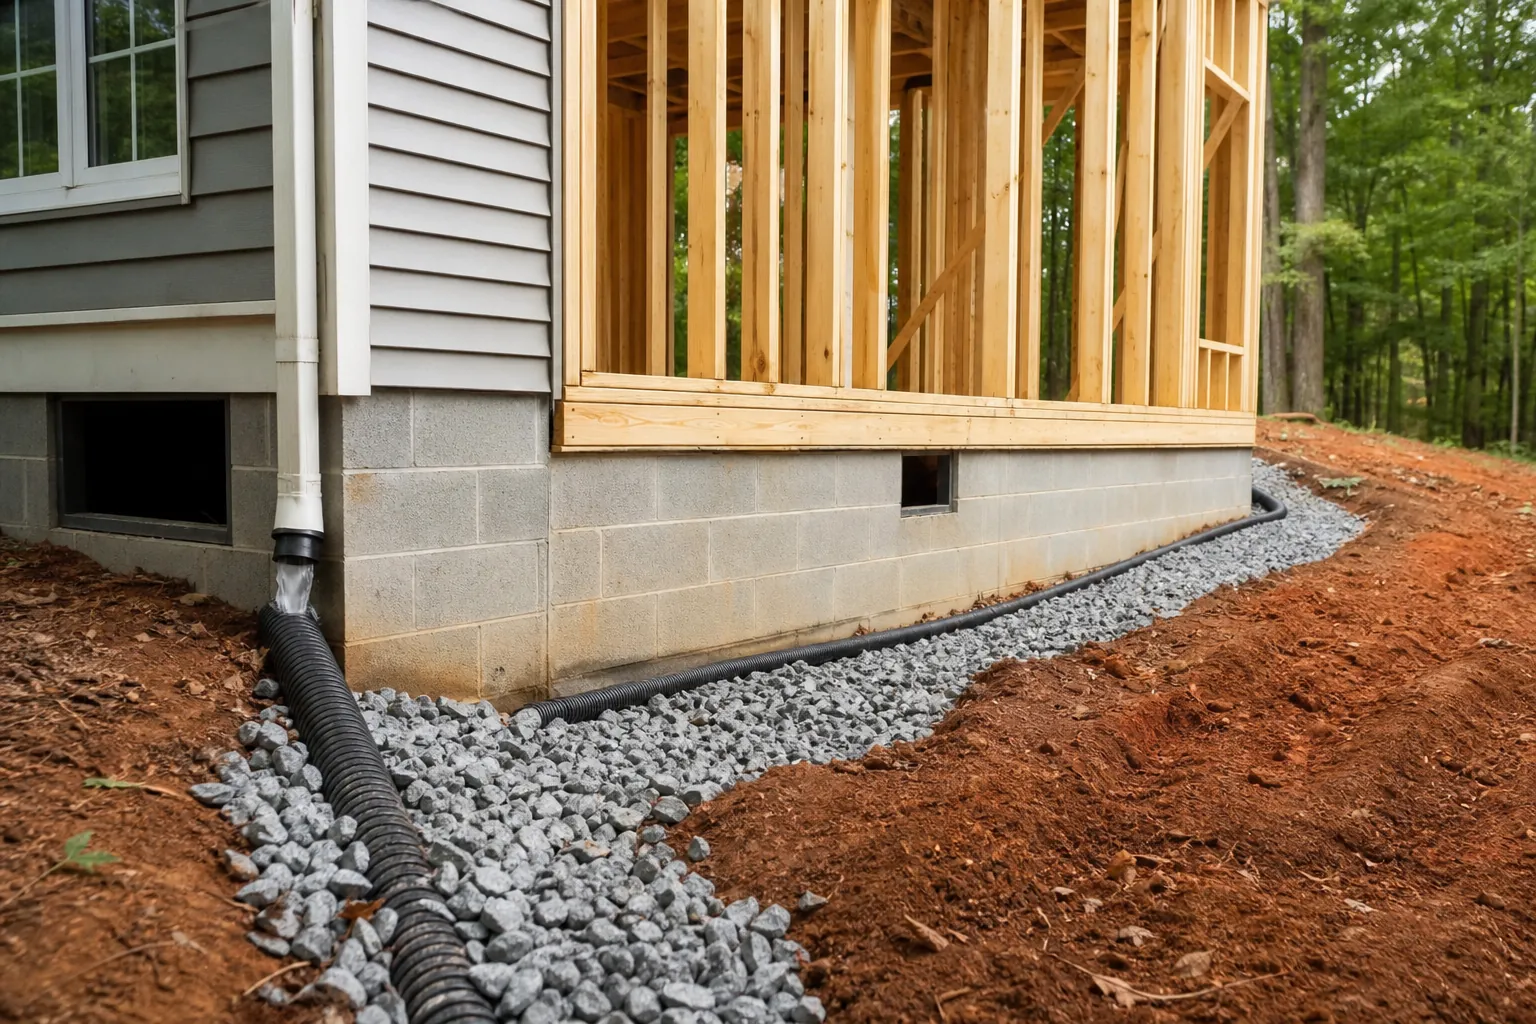
Exterior grading should direct surface water away from the foundation wherever site conditions allow. Gutters and downspout extensions should discharge to an appropriate location rather than beside the crawl space entrance or addition wall.
Foundation drainage requirements depend on the design, soil, site, and applicable code. Your builder should coordinate footing drains, waterproofing or dampproofing, and any discharge arrangements with the project plans and local requirements.
If an interior drainage system or sump pump is needed, establish that before installing the encapsulation liner. The discharge location must be suitable, and the pump should remain accessible for maintenance. A sump is not automatically necessary for every addition, but persistent water deserves a specific solution.
- Ask who is responsible for final grading after excavation and landscaping work.
- Confirm where each new downspout will discharge once construction is complete.
- Document any existing water entry before the new foundation obscures its source.
- Make sure drainage equipment can be serviced without damaging the liner.
Decide How The Old And New Crawl Spaces Will Connect
The connection between the original house and the addition is often the most important planning detail. A foundation wall may remain between the two spaces, with limited openings for access or utilities. That arrangement can complicate installation and ongoing moisture control.
Do not assume one dehumidifier will serve both areas effectively. Capacity, compartment layout, air movement, and drainage all matter. A small opening between sections may not provide enough circulation for a single unit to control humidity throughout the combined space.
Your contractor should determine whether the spaces will function as one enclosure or as separate controlled areas. That decision affects liner continuity, sealing at the connection, equipment placement, and how conditions will be monitored.
Structural changes to an existing foundation wall need qualified review. Creating or enlarging an opening is not simply an encapsulation task. The builder or design professional should establish what is structurally appropriate and what permits or inspections apply.
Check The Existing Encapsulation System
If your original crawl space is already encapsulated, inspect it before extending the system. Look for torn material, loose seams, failed wall attachments, condensation, and water beneath the liner. Check whether existing equipment has been maintaining suitable humidity.
The transition should connect durable, compatible materials with a clear sealing detail. An overlap alone is not necessarily a reliable connection. New construction may also damage existing encapsulation as workers move materials, cut openings, or reroute utilities.
Photograph the original system before work begins. Those images provide a useful reference when the builder and encapsulation contractor review construction-related damage or agree on repairs.
Build A Complete Encapsulation Plan
A complete plan considers the ground, walls, vents, access doors, penetrations, insulation, and humidity control. The exact assembly should fit the foundation design and comply with the locally adopted building code. North Carolina projects may involve different inspection expectations depending on the jurisdiction and scope.
Ground And Wall Coverage
The ground liner should be durable enough for expected service traffic and installed with properly sealed seams. Coverage around piers, columns, and irregular foundation surfaces needs particular attention because those areas can leave gaps in an otherwise continuous barrier.
Wall coverage and attachment details should account for local inspection requirements, including any required termite inspection provisions. Do not assume that covering every visible surface is appropriate. Your contractor should coordinate the assembly with the building inspector and, when relevant, the pest-management provider.
Air Sealing And Access
Vents, utility penetrations, and access doors are common leakage points. An encapsulated crawl space needs a coordinated approach to outside-air entry rather than a ground liner beneath an otherwise open foundation.
Access doors should close securely and permit routine inspections. Position them so that workers can reach plumbing, electrical connections, drainage equipment, and humidity-control equipment without crawling through unnecessarily tight passages.
Insulation And Humidity Control
Insulation placement depends on whether the crawl space is designed as vented or unvented and on the approved thermal-envelope details. Avoid mixing approaches without reviewing the overall assembly. Existing damaged or wet insulation may need removal before the new system is completed.
A sealed crawl space still needs an approved moisture-control approach. Depending on the design, that may involve a dedicated dehumidifier or another code-compliant conditioning method. Equipment should be selected for actual conditions, not floor area alone.
Condensate drainage, electrical supply, service clearance, and filter access should be planned before installation. A unit hidden behind piping or placed where water cannot drain reliably will be difficult to maintain.
Schedule The Work Around Construction Milestones
The best installation date is not always immediately after the foundation is poured. Encapsulation materials can be damaged by framing debris, plumbing work, and repeated construction traffic. At the same time, waiting until everything is finished can make important areas difficult to reach.
Coordinate a sequence with the builder and encapsulation contractor. Early planning should settle drainage and foundation details. Final installation should occur when the space is clean, major utility work is sufficiently complete, and remaining trades can protect the finished system.
Required inspections may determine when certain areas can be covered. Ask the builder which inspection milestones affect liner placement, insulation, foundation visibility, or access to mechanical work.
- Review crawl space details before excavation so the foundation plan includes access and drainage needs.
- Inspect the new foundation and existing connection before concealed areas become difficult to evaluate.
- Complete necessary water-management work before installing the final liner.
- Remove sharp debris and construction waste before encapsulation begins.
- Arrange a final walkthrough after remaining trades finish work beneath the addition.
If the liner must be installed before all trades are finished, establish protection rules. Temporary walking protection, designated routes, and clear responsibility for repairing damage can prevent avoidable disputes.
Understand What A Useful Estimate Includes
There is no dependable universal price for encapsulating a home addition. Two additions with similar square footage can require very different work because of crawl space height, access, drainage, existing conditions, and the complexity of connecting to the original house.
A written estimate should describe the scope rather than provide only a total. You need to know whether the proposal includes the existing crawl space, just the new area, or repairs at the transition between them.
Material specifications matter, but installation details matter too. Ask how seams, piers, wall attachments, penetrations, and access doors will be handled. A thicker liner alone does not establish that the enclosure will be complete.
- The estimate should identify the areas to be encapsulated and any excluded sections.
- Drainage work, sump equipment, and discharge arrangements should be listed when included.
- The proposal should explain the intended humidity-control equipment and condensate route.
- Cleanup, insulation removal, electrical work, and construction-damage repairs should have clear responsibilities.
- Warranty terms should distinguish material coverage, installation coverage, and equipment coverage.
Also ask what could change the price after work begins. Hidden water problems, inaccessible sections, or damaged framing may require additional evaluation. Clear communication about those possibilities is more useful than an unusually low quote with an undefined scope.
Avoid Common Addition Planning Mistakes
One frequent mistake is treating the crawl space as an isolated finishing item. By the time someone notices that access is too small or drainage is incomplete, correcting those issues may affect work that is already finished.
Another mistake is assuming new construction is automatically dry. Concrete, masonry, wet soil, and rain exposure can contribute moisture during construction. The enclosure should be evaluated and dried as needed rather than sealed around unresolved wet conditions.
Do not ignore wood condition in the original crawl space. Suspected decay, pest damage, or significant microbial growth warrants appropriate evaluation. Encapsulation controls moisture pathways, but it does not repair structural damage or replace necessary remediation.
Finally, avoid promising that encapsulation will solve every comfort or indoor-air concern. Moisture control can support better building performance, but upstairs humidity, odors, and temperature differences may also involve HVAC sizing, duct leakage, or other building issues.
Check Performance After The Addition Is Finished
Once construction is complete, walk through the crawl space with the contractor. Look for torn material, open seams, unsealed penetrations, and loose attachments. Confirm that access doors operate properly and that equipment can be reached safely.
Check the condensate drain and any sump system. Ask how to verify operation and what maintenance is required. Keep equipment instructions, warranty documents, and photographs with your addition records.
Humidity monitoring is useful after installation, especially through a North Carolina summer. Place sensors where they represent conditions in the space rather than directly beside equipment discharge. Separate compartments may need separate monitoring points.
There is no single reading that explains every condition. Sustained elevated humidity, standing water, condensation, or a new musty odor should prompt a review. Equipment settings, drainage, air leakage, and construction damage are all worth checking.
- Inspect the crawl space after heavy rain to confirm that water management is working.
- Follow the manufacturer's schedule for cleaning or replacing dehumidifier filters.
- Check exposed liner areas after plumbing, electrical, or HVAC service visits.
- Keep stored items from blocking access, drainage paths, and equipment clearances.
Plan Your North Carolina Addition With Moisture In Mind
A well-planned crawl space starts with coordinated decisions, not a last-minute material purchase. Address water first, define the connection between old and new construction, choose an appropriate enclosure assembly, and schedule installation around inspections and trade work.
If you are planning a crawl space encapsulation home addition project in North Carolina, Carolina Encapsulation Company can discuss the conditions beneath your home and the details of your proposed addition. Bring available drawings, photos, and information about previous moisture problems to make that conversation more productive.
Call 704-207-9348 to discuss your project. An early review can help you coordinate practical moisture-control details before construction makes them harder to address.
Call 704-207-9348 to talk through next steps.