A crawl space drainage system collects liquid water, routes it to a controlled low point, and discharges it away from the foundation. It should be planned from entry to outlet. A channel, basin, or pump cannot prevent every leak or guarantee dry conditions when roof runoff, grading, plumbing, groundwater, or discharge problems remain unresolved.
Water in a Triangle-area crawl space can arrive through several paths during the same storm. Runoff may reach a low wall while saturated soil feeds another area. A plumbing leak may add water from above. The correct scope identifies each source, chooses a collection path, and confirms where the water can safely go.
What does a crawl space drainage system do?
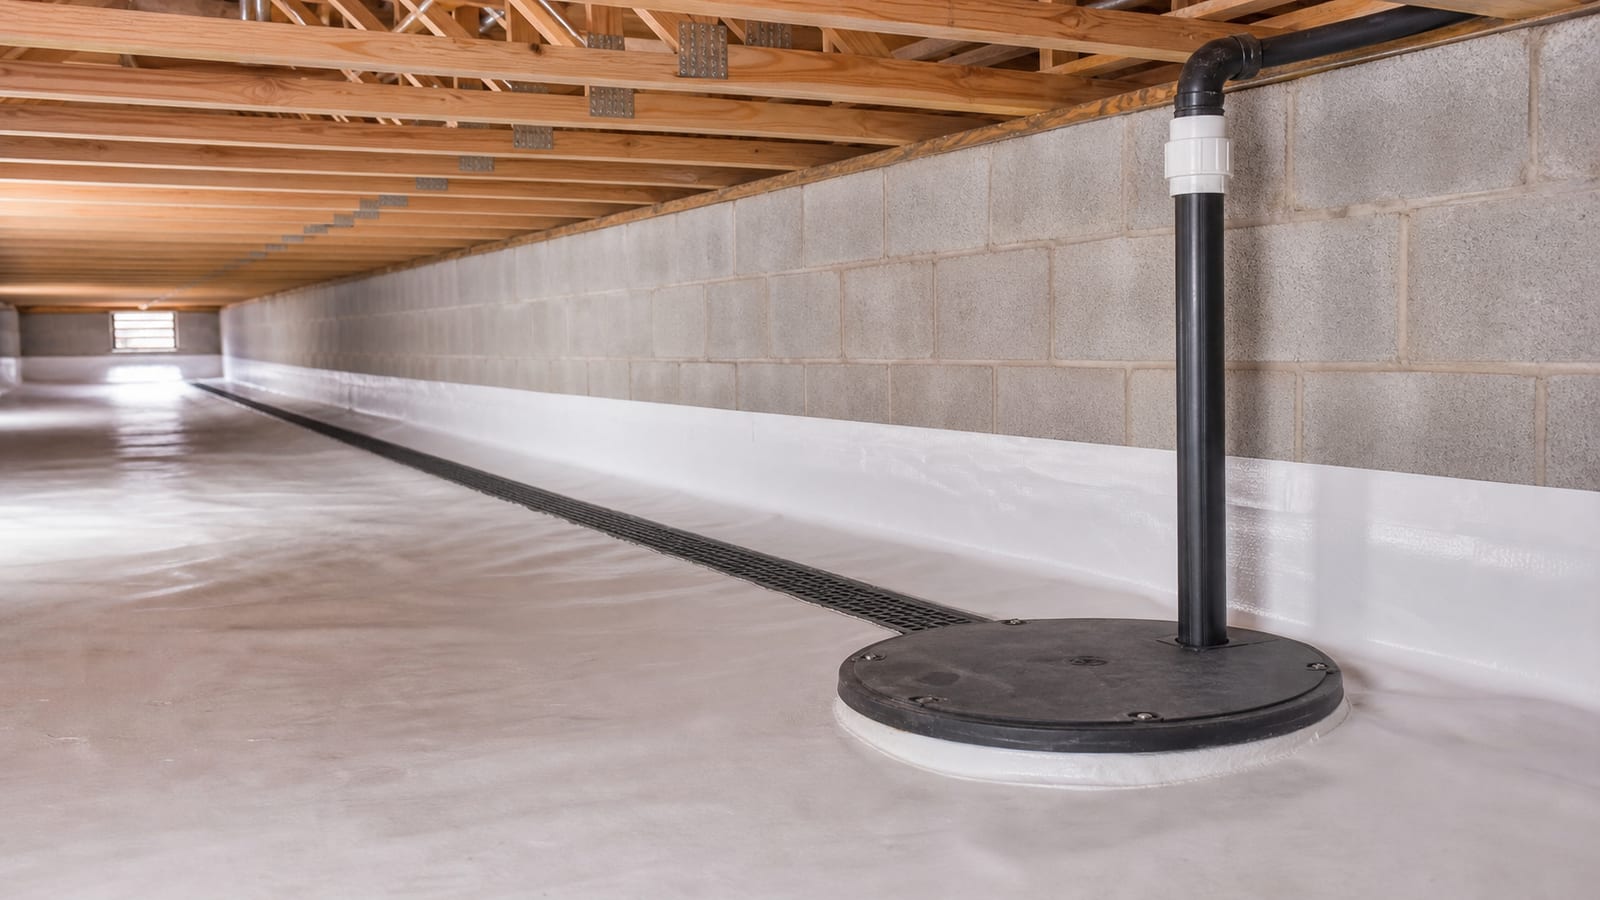
A crawl space drainage system manages liquid water after it reaches a collection zone. Its components may include perimeter channels, aggregate, drainage pipe, inlets, a sump basin, a pump, check valve, discharge piping, outlet protection, and alarms. It does not replace roof-water control, grading, ground-vapor control, or plumbing repair.
The system has four linked functions:
- intercept: meet water where it enters or moves;
- collect: provide a lower, open path toward the basin or outlet;
- discharge: move water to a location that does not send it back;
- verify: allow inspection, testing, maintenance, and response to failure.
Weakness in one function can affect all the others. A clean channel can still fail if its basin is too high. A pump can run while a blocked outlet returns water toward the house. A buried pipe can look complete while its slope or aggregate limits flow.
Drainage should also be distinguished from vapor control. A ground liner limits water vapor from soil. It may direct incidental water depending on the design, but it should not be treated as the only drainage path. Water trapped beneath a liner can move beyond the visible entry point and appear as raised areas or sediment at seams.
Where does crawl space water usually enter?
Crawl space water can enter from roof runoff, negative grade, low vents or access doors, wall joints, soil, plumbing, HVAC condensate, and failed drains. Finding the highest wet point and comparing it with exterior evidence helps separate sources. The puddle’s final location is not always the place where the water entered.
Start outside after conditions are safe. Trace:
- roof valleys and gutter overflow;
- downspout connections and extensions;
- buried outlet locations;
- soil and mulch slope;
- ponding near walls;
- settlement beside porches and utilities;
- low vents, wells, and access thresholds;
- discharge pipes that end too close to the house.
Inside, inspect high, middle, and low. High includes plumbing, subfloor, and framing. Middle includes walls, ducts, pipes, and equipment. Low includes the liner, soil, perimeter, channels, drains, and basins.
Timing also matters. Water that appears only during fixture use suggests a different path from water that follows long rain. A crawl space that floods quickly during one intense storm may have a surface-runoff problem. A slow rise after prolonged wet weather may involve saturated soil or subsurface conditions.
The EPA guide to mold and moisture supports the central principle that moisture control begins with addressing the water source. It does not establish that one drainage product will fit every house.
What are the 6 stages of a drainage plan?
A sound drainage plan has six stages: document, reduce exterior load, define entry, select collection, design discharge, and verify operation. The stages keep a pump or pipe from being installed before the water path is understood. They also create a maintenance record for storms, outages, and future property work.
-
Document the water event. Record date, rainfall, duration, water depth, affected areas, pump status, and photographs. Preserve sediment and stain patterns before cleanup. They can show direction and recurrence.
-
Reduce avoidable exterior load. Correct gutter overflow, disconnected downspouts, ponding, and obvious negative grade where practical. Interior systems should not receive roof water that can be moved away above ground.
-
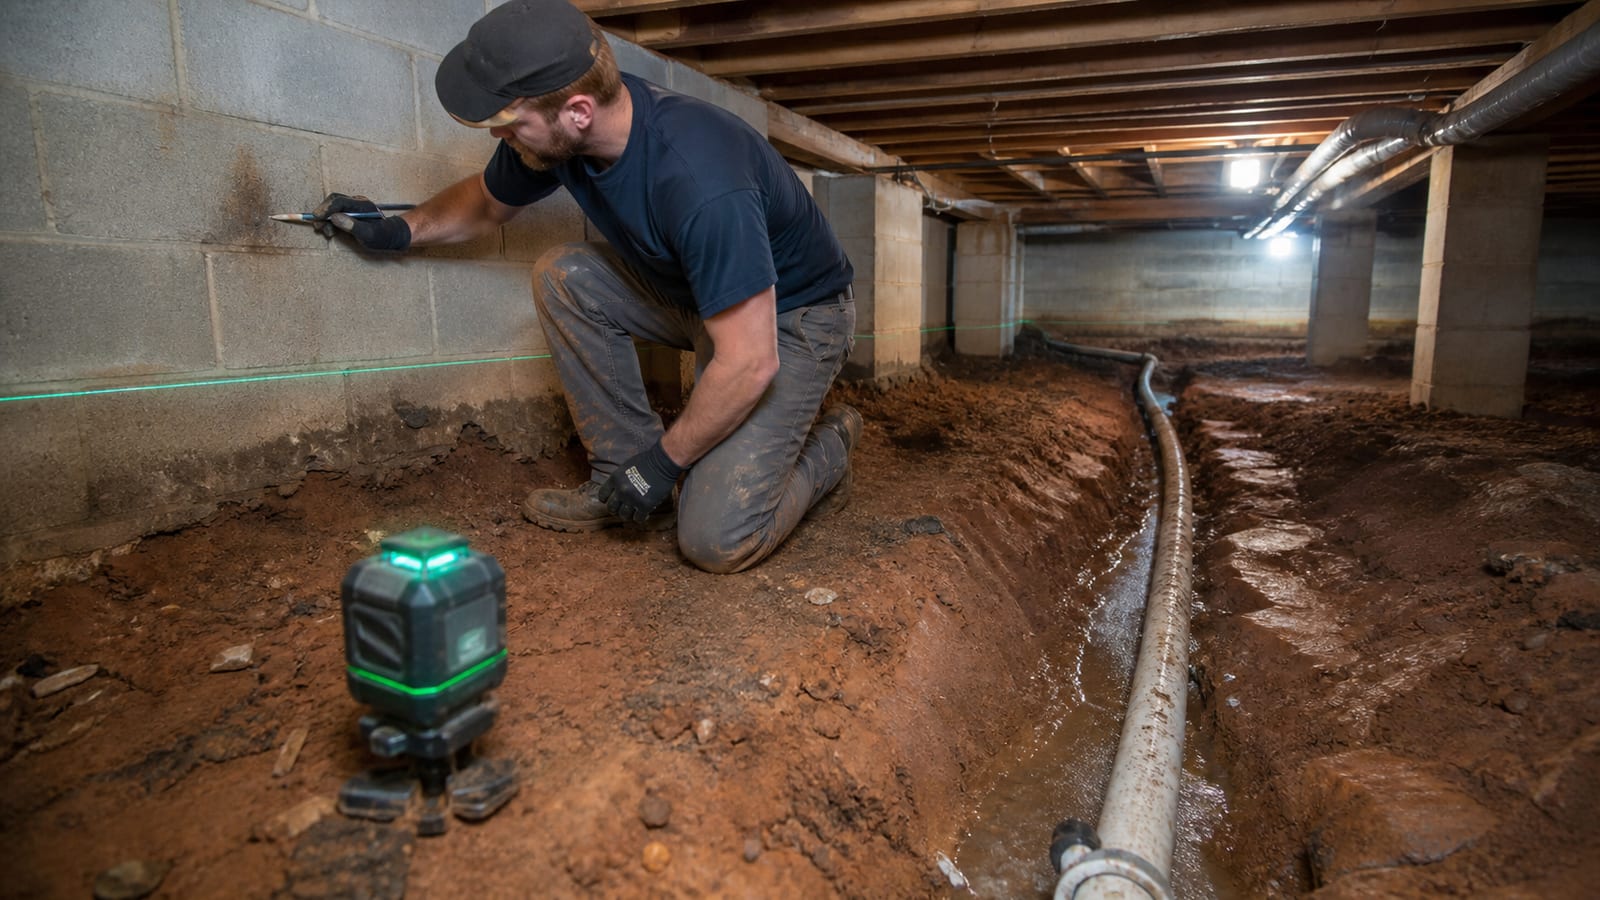
Define entry and movement. Map wall joints, low openings, plumbing, liner bubbles, and soil pathways. Mark high and low points. Water can travel under a liner or along a footing before appearing elsewhere.
-
Select the collection route. Decide whether a perimeter channel, localized inlet, drainage pipe, or combination matches the evidence. Set elevations so water reaches the collection path rather than bypassing it.
-
Design complete discharge. A gravity outlet needs verified slope and a safe destination. A pumped system needs a basin, pump, controls, power, check valve where appropriate, piping, and an outlet that resists blockage and return flow.
-
Test and maintain the system. Establish safe inspection procedures, alarm response, filter or inlet checks, and outlet review. Retest after storms, landscaping, utility work, and power interruptions.
How do French drains and sump pumps work together?
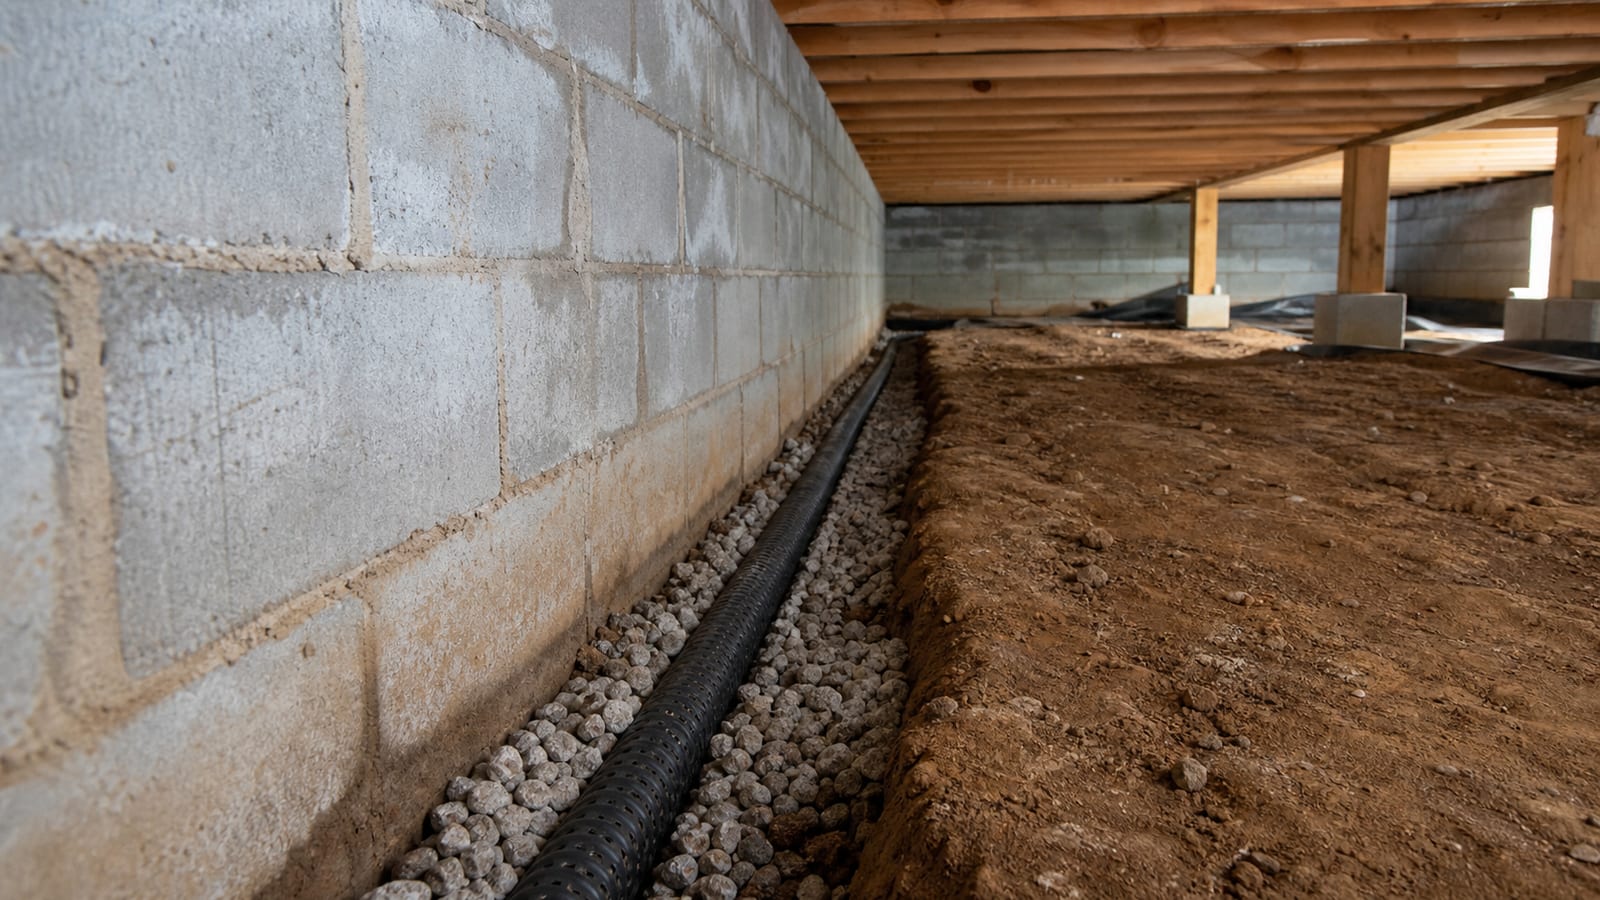
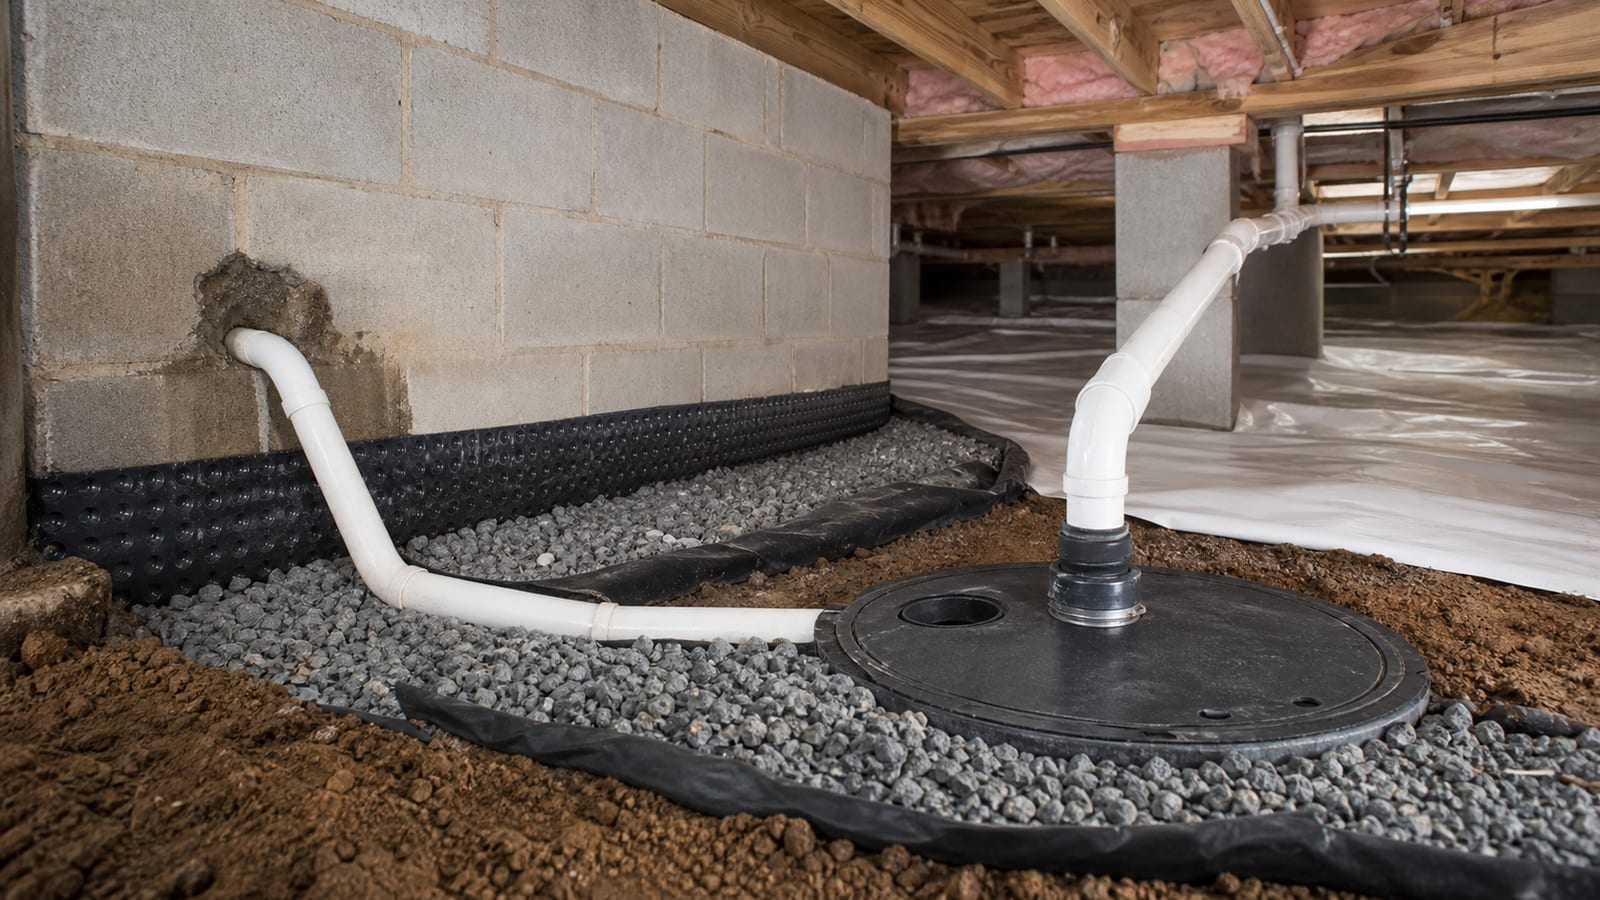
A French drain creates a lower-resistance path for water to move through aggregate and pipe, while a sump pump lifts collected water when gravity cannot provide a suitable discharge. They work together only when channel elevation, pipe flow, basin placement, pump operation, and the exterior outlet form one continuous route.
The drain should meet water along the active perimeter or low area. Aggregate helps water reach the pipe while limiting soil migration when the assembly is designed correctly. The pipe carries water toward the basin. The basin provides storage and pump cycling space.
The pump then raises water into discharge piping. That pipe must carry flow through the wall and far enough away that it does not return. A check valve may reduce water falling back into the basin after a cycle, depending on the pump and installation.
Problems can occur at each connection:
- water bypasses a channel that sits too high;
- sediment enters through poor separation;
- pipe dips hold debris;
- a basin receives water from only one side;
- the pump intake becomes blocked;
- discharge freezes, disconnects, or erodes soil;
- outlet water flows back toward the foundation.
The crawl space drainage systems service describes collection and discharge as a connected scope. The foundation drainage improvements service addresses exterior measures that may reduce the amount reaching the crawl space.
What should be checked at the discharge point?
The discharge point should be checked for safe distance, positive drainage, erosion, blockage, freezing exposure, property impacts, and return flow. A pipe that moves water out of the basin has not completed its job if the outlet sends that water toward the same foundation, a neighbor, a walkway, or an unstable slope.
Inspect the entire visible route. Look for crushed sections, loose joints, unsupported spans, and low spots. At the outlet, confirm that vegetation, mulch, sediment, insects, or a submerged termination do not restrict flow.
During safe testing, observe:
- whether water exits during a pump cycle;
- whether the outlet surges or backs up;
- whether water remains near the pipe;
- whether the ground carries it away;
- whether it erodes soil;
- whether water returns after the pump stops;
- whether another drainage system receives the flow.
Buried routes deserve documentation because landscaping and utility work can damage them. Keep photographs, approximate locations, and outlet details with the property records.
A drainage outlet cannot be assumed legal or appropriate simply because one already exists. Site boundaries, stormwater rules, septic areas, slopes, and municipal requirements may affect the destination. Verify project-specific requirements before changing it.
How does Carolina Encapsulation Company evaluate drainage?
Carolina Encapsulation Company can evaluate drainage by starting with the reported water event, tracing exterior and interior evidence, mapping elevations, and reviewing the complete path to discharge. A free inspection helps identify which components address the observed conditions rather than presenting one pump or channel as a universal answer.
The practical trade detail is that the lowest visible puddle is not always the best basin location. The basin must receive the intended collection route, remain serviceable, and support a safe discharge path. An isolated low spot can be caused by a torn liner or settlement while the main water movement follows another perimeter.
The inspection can document:
- exterior runoff and grade;
- wall, vent, and access entry;
- plumbing and condensate;
- water above or beneath the liner;
- existing channels and drains;
- basin and pump condition;
- power and alarm status;
- discharge route and outlet;
- visible wet insulation or framing.
There are honest limits. A visual inspection cannot confirm every buried pipe, groundwater elevation, concealed wall crack, electrical condition, or structural need. Excavation, plumbing, electrical work, engineering, or official review may be required when the evidence extends beyond the visible crawl-space drainage scope.
How should a drainage system be maintained?
Maintain a crawl space drainage system by inspecting collection paths, basin, pump, controls, alarm, discharge pipe, and outlet on a regular schedule and after major storms or outages. Remove only accessible debris according to equipment instructions. Record test results and investigate changes instead of assuming a running pump means complete drainage.
A maintenance log should include:
- Date and recent weather.
- Water level and visible sediment.
- Channel and inlet condition.
- Basin lid and interior observations.
- Pump activation and sound.
- Alarm and backup status if present.
- Visible pipe joints and supports.
- Outlet flow and erosion.
- Return flow after cycling.
- Changes to grade or landscaping.
Do not reach into a basin, manipulate a float in wet conditions, or open powered equipment. Use the test method specified for the installed equipment. If water contacts electrical components or wiring appears damaged, stop and arrange appropriate electrical evaluation.
After a power outage, inspect before assuming the system recovered. Water may have exceeded the basin, shifted debris, or entered areas not normally wet. The same applies after a pump replacement: verify the outlet and collection path rather than testing only the new motor.
Frequently asked questions about crawl space drainage systems
These answers address drainage limits, liners, gravity flow, pumps, maintenance, and discharge. A particular house still needs a source-to-outlet review based on its water evidence and site conditions.
Can a drainage system guarantee a dry crawl space?
No. A drainage system manages specified liquid-water paths but cannot guarantee dry conditions under every storm, plumbing failure, groundwater change, power outage, or maintenance condition. Ground vapor and humidity also require separate controls. A sound scope defines what the system addresses, how it is monitored, and what conditions remain outside it.
Does a vapor barrier replace a crawl space drain?
No. A vapor barrier limits water vapor from soil and may direct incidental water in some designs, while a drain collects and routes liquid water. Water can accumulate beneath a liner if entry continues. Each layer should have a defined function, and neither should conceal an unresolved source.
Can crawl space water drain by gravity?
Gravity drainage may work when the collection point has continuous fall to a safe, permitted outlet that will not submerge or return water. Many sites lack that elevation. Verify slope along the entire route and the destination. A pipe that starts downhill but rises later is not reliable gravity drainage.
How do I know whether a sump pump is working?
Follow the equipment’s safe test procedure and observe activation, discharge, shutoff, sound, and return flow. Check the outlet, not only the basin. A running motor does not prove the pipe is open or water is leaving safely. Do not reach into water or handle wet electrical components.
Why is there still water after a drain was installed?
Water may bypass the collection path, enter from above, remain beneath a liner, exceed capacity, or return through a blocked discharge. The drain elevation may also miss an isolated low spot. Document the highest wet point and event timing, then inspect every connection from entry to outlet before adding components.
Should a drainage system be checked before a storm?
Yes, when conditions are safe. Confirm that inlets and outlets are visible, the basin and alarm show normal status, discharge piping is connected, and backup provisions match their instructions. Do not perform risky wet electrical testing. After the storm, record water levels and changes so recurring limits can be identified.
A drainage system is a route, not a single product. If your crawl space has standing water, liner bubbles, wall entry, or an unreliable pump, call Carolina Encapsulation Company at 704-207-9348 or request a free crawl space inspection to trace the path from source to discharge.
How this applies in Garner, NC
For homeowners in Garner, NC, use this topic as a way to organize observations before selecting work. Carolina Encapsulation Company serves Garner, NC and surrounding Triangle communities, but the appropriate scope still depends on the water, moisture, materials, access, and equipment found at the property. Compare the crawl space drainage systems with the Garner, NC crawl space service area before choosing a property-specific next step.